Mask the object
Brush over the full distraction and overlap the edge slightly so the blend area has enough context.
Remove people, clutter, text, small defects, and distracting objects from photos while rebuilding the background naturally.
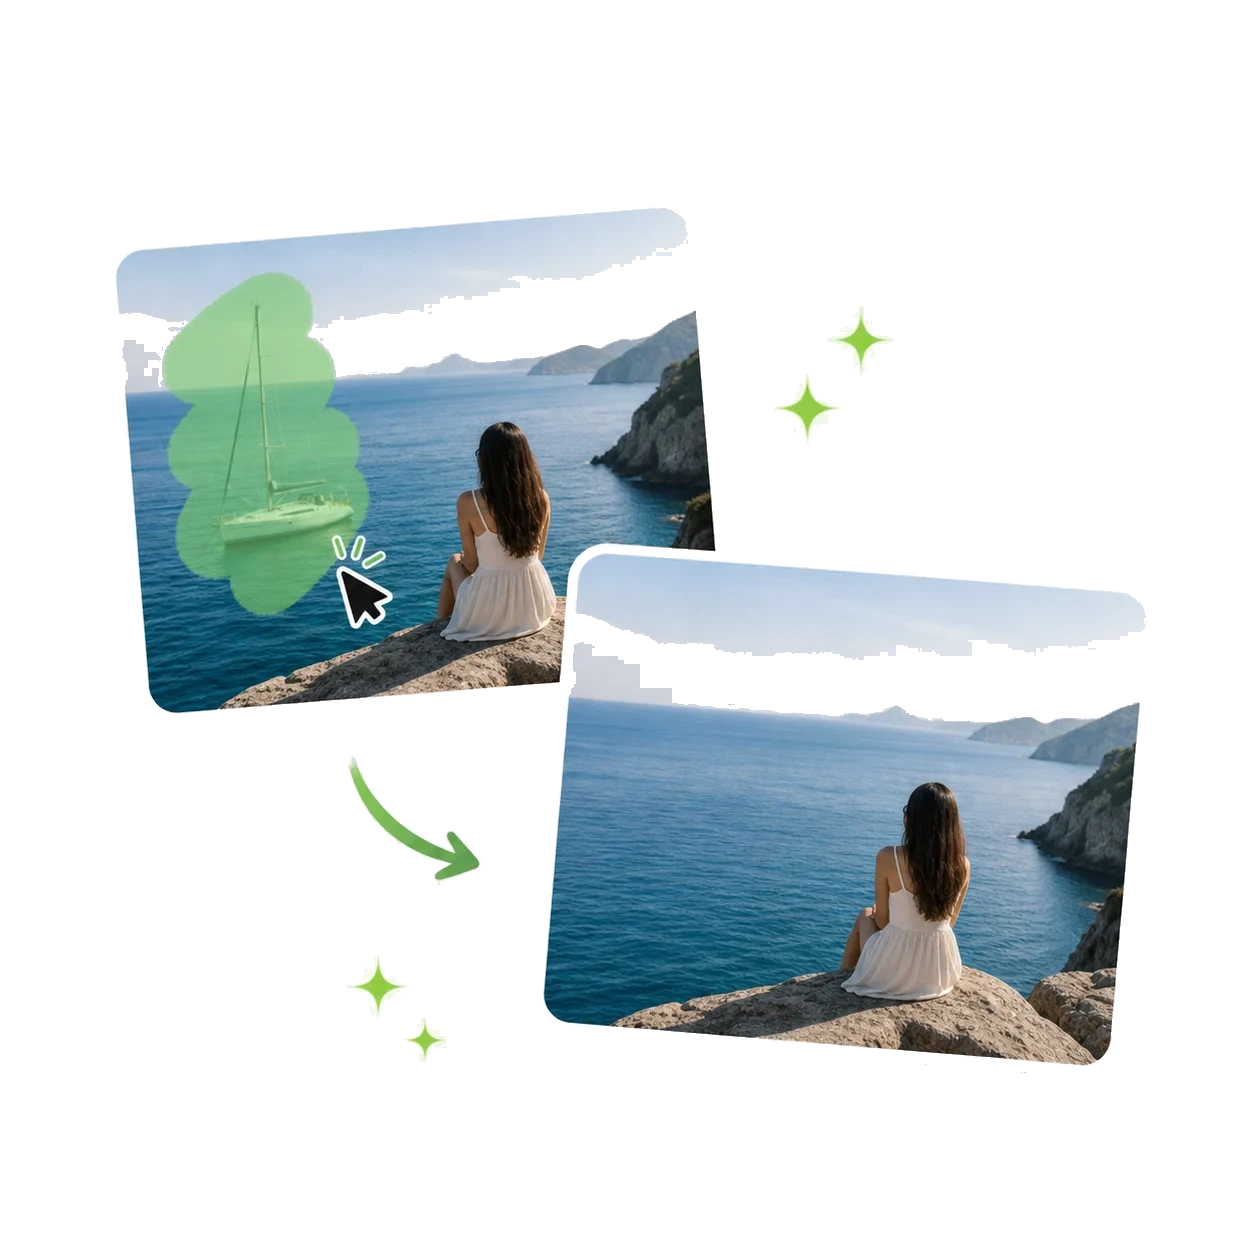


Remove people from a travel photo
Cleanup rules
Object removal works best when the page keeps the job specific: mark the distraction, remove it, and preserve the photo around it.
Brush over the full distraction and overlap the edge slightly so the blend area has enough context.
Ask for removal and background continuation. Avoid describing unrelated style changes.
Zoom into shadows, hard lines, repeated textures, and reflections before downloading the final image.
Repair quality
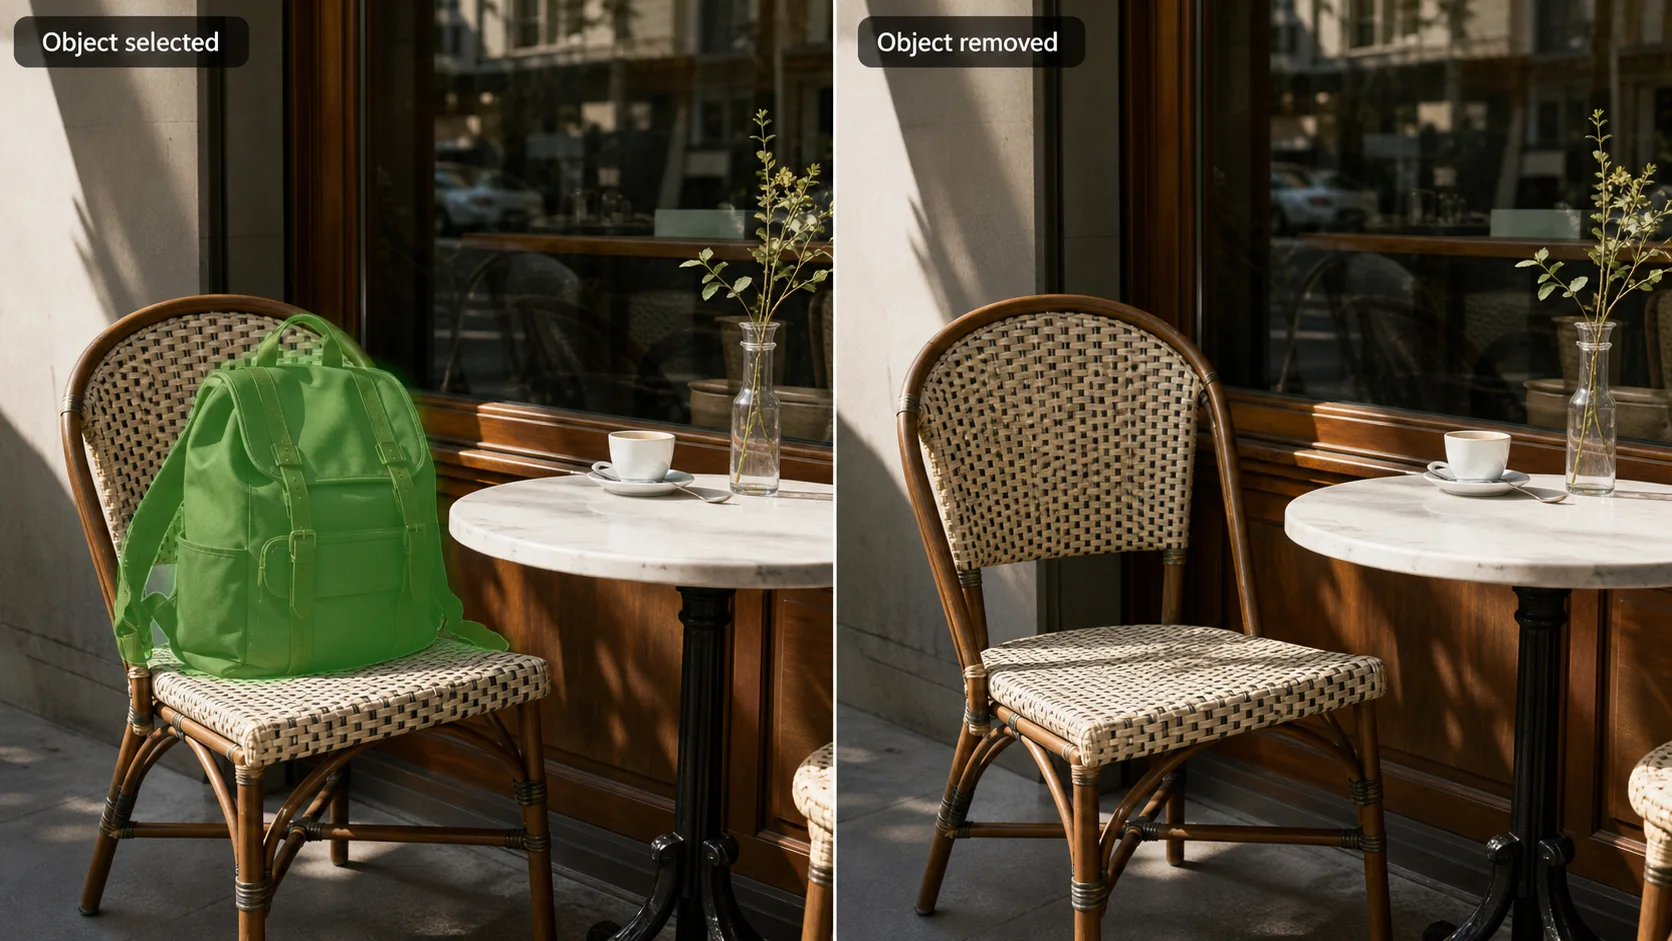
A good AI object remover result should look like the object was never there, not like a blurry patch was placed on top.
01 / cleanup check
Keep the subject, camera angle, and original lighting while removing the selected object instead of regenerating the whole image.
Clean a photo
02 / cleanup check
Continue walls, sky, tabletops, fabric, floors, and product surfaces so the repaired area does not look cloned or pasted.
Clean a photo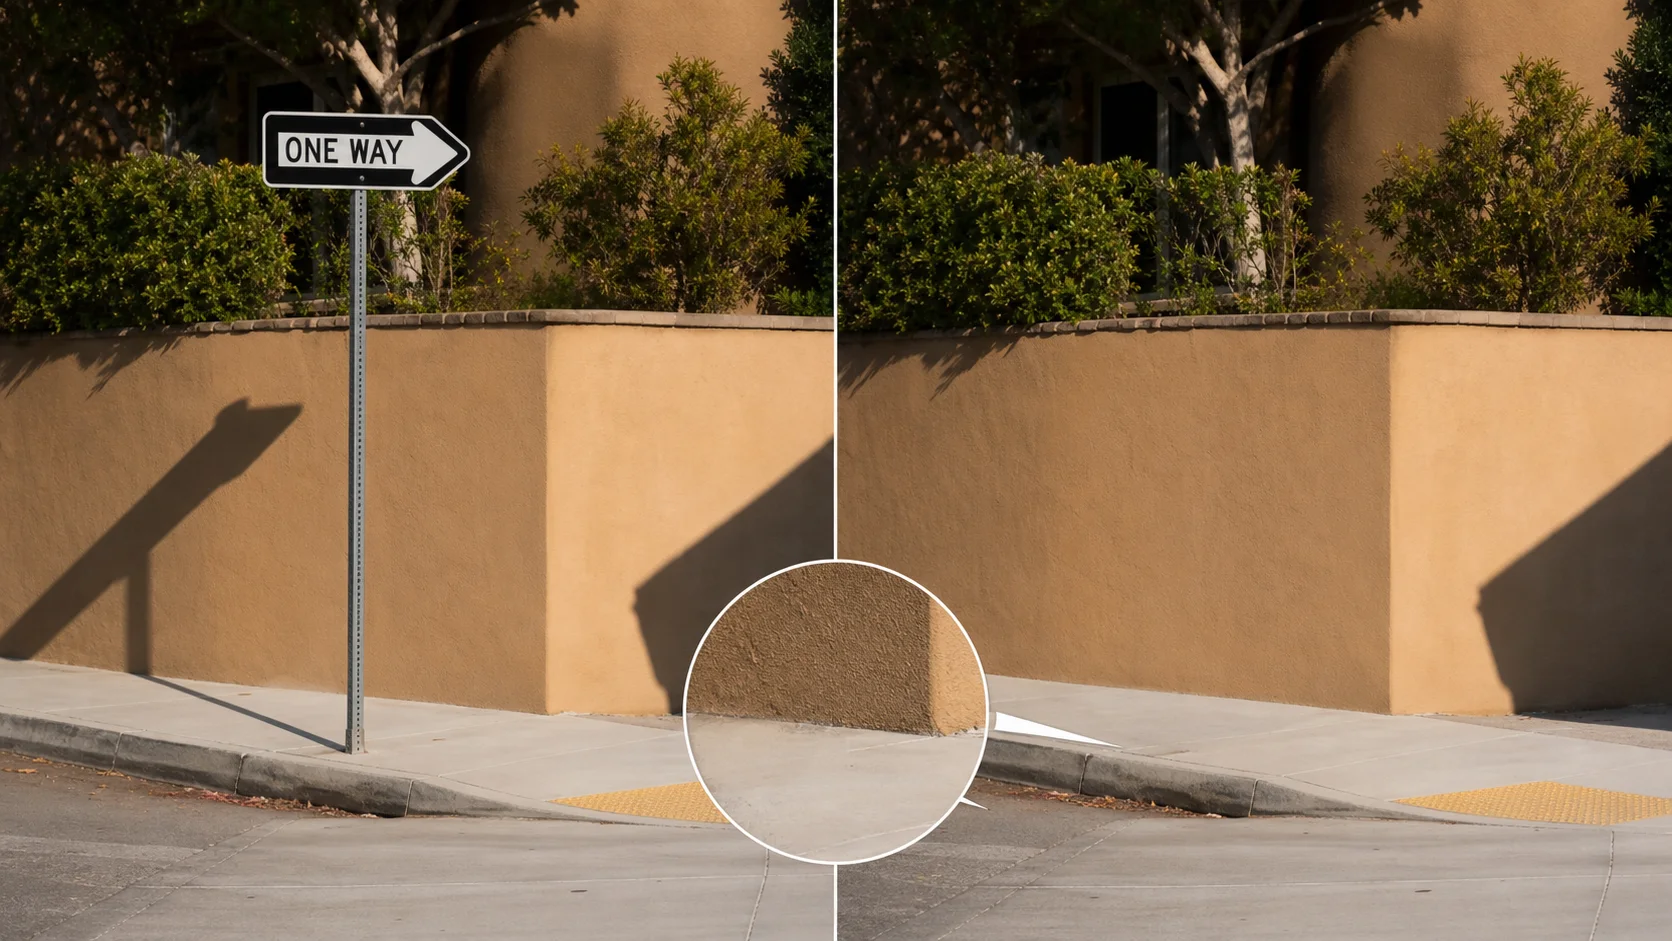
03 / cleanup check
Look closely at shadows, object edges, reflections, and repeated patterns before using the cleaned image in a listing or campaign.
Clean a photoBefore and after
Before and after cases make the quality obvious. The removed area should inherit the original surface, light, and perspective.
BeforeAfter Before
 After
After Before
 After
After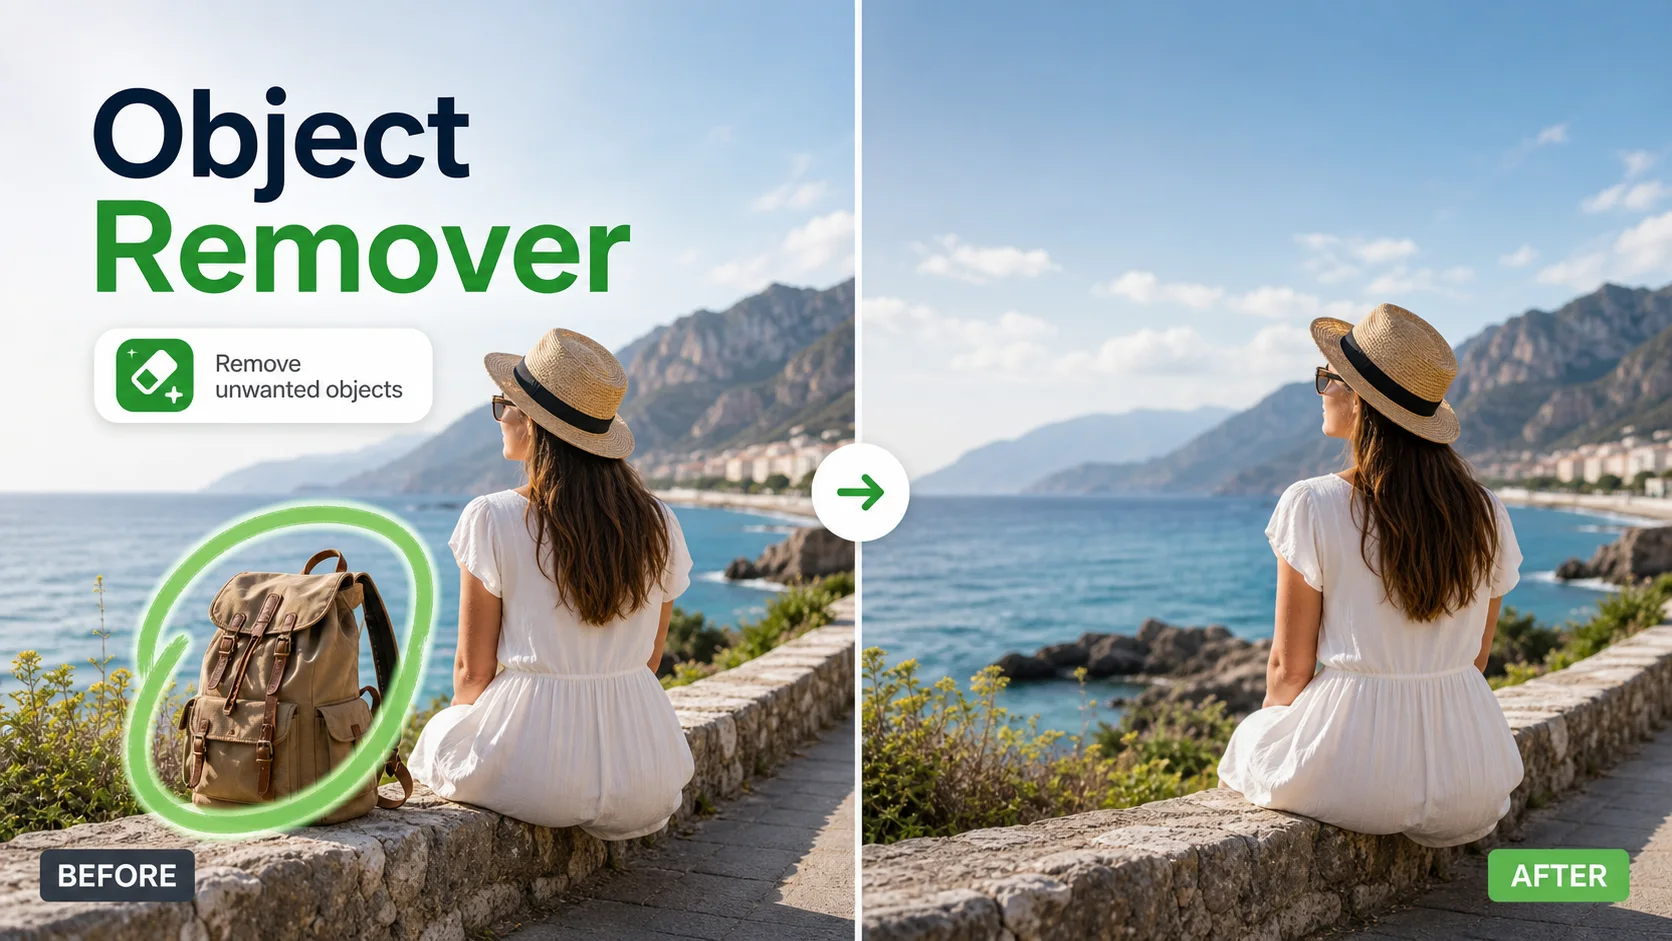
User pain points
Most users do not want a creative transformation. They want one distracting thing gone without opening a complex editor.
Tourist photos often have one passerby or sign ruining the frame.
Product shots need tags, dust, cables, or props cleaned before publishing.
Manual clone tools are slow and leave repeated texture artifacts.
Generic image generation changes the whole scene when the user only needs removal.
Use cases
Keep each edit narrow. These are the common cleanup jobs users expect from an AI object remover.
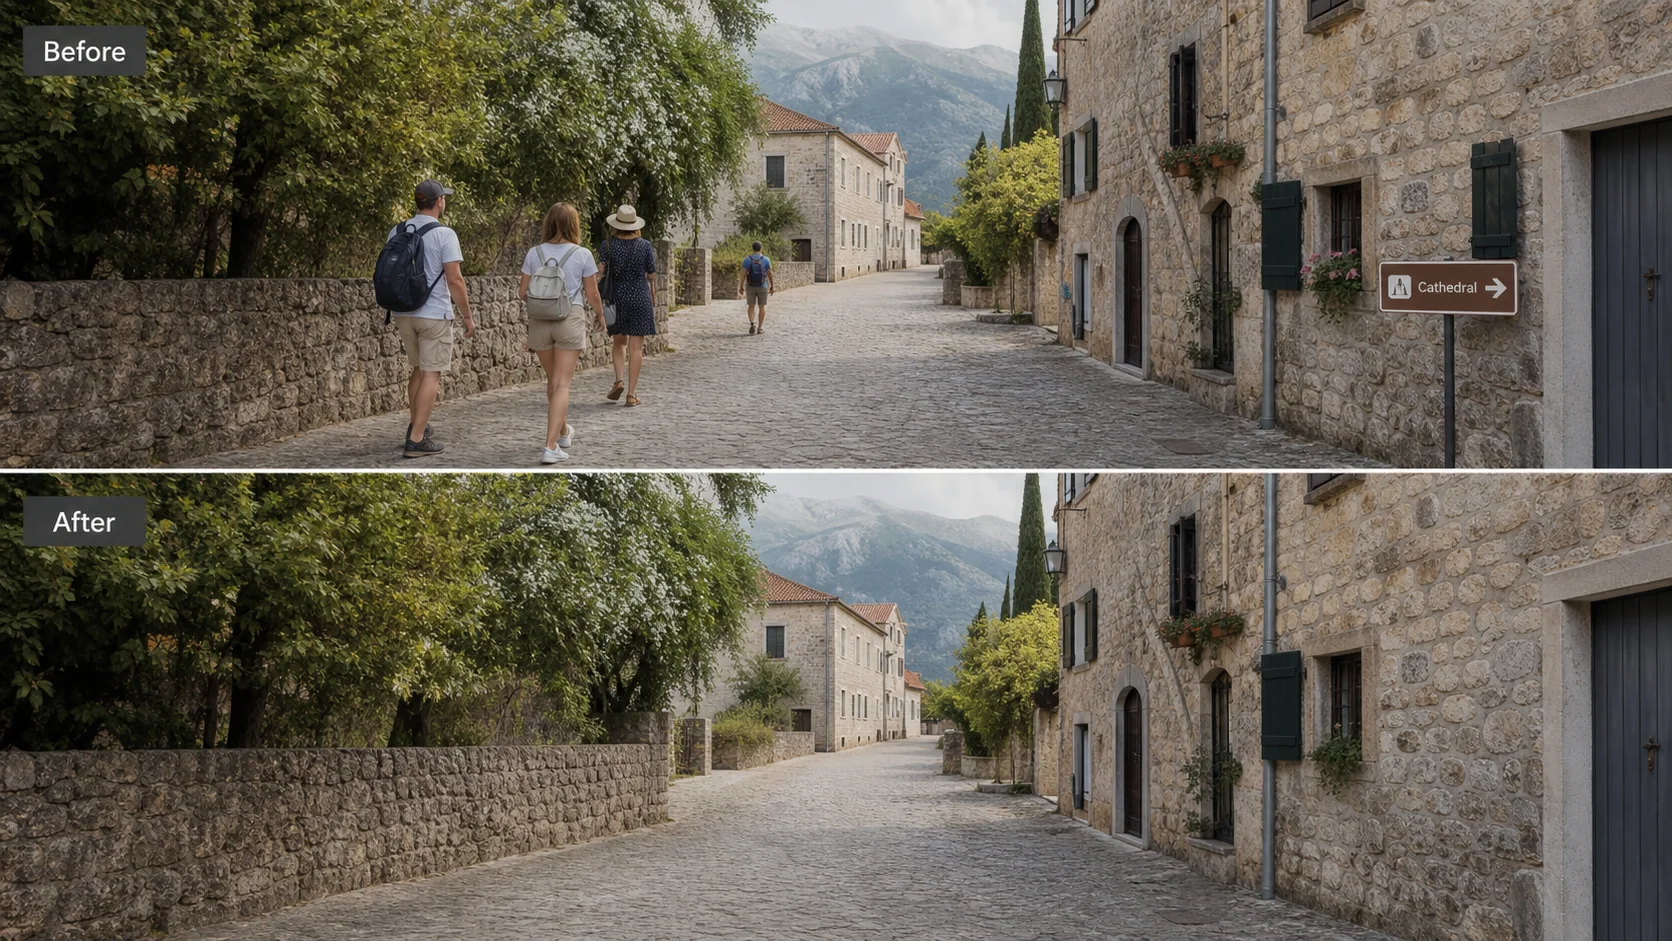
Remove passersby, signs, bags, trash cans, and small distractions from travel photos.

Clean labels, props, dust, cables, tags, and background clutter around product shots.

Remove background distractions while keeping the person, pose, skin tone, and lighting stable.

Erase small room objects, wall marks, cords, or surface mess without changing the scene.
Workflow
One object at a time gives the model clearer context and makes the repaired area easier to inspect.
Upload the photo you want to clean.
Brush over one unwanted object or text area.
Generate a clean fill that follows the original background.
Repeat on another object only after the first repair looks natural.
An AI object remover lets you mark an unwanted object in a photo and generate a clean version where the surrounding background is reconstructed.
Photos with visible background texture around the object work best. Travel scenes, product photos, room shots, portraits, and lifestyle images are good candidates.
Yes. Brush over the passerby or crowd area and keep the edit focused on removal. Results are strongest when the blocked background is simple and predictable.
Yes, it can clean small text, labels, dust, scratches, cables, and blemishes. Large readable text over complex detail may need a tighter mask and a second pass.
No. A background remover separates the subject from the whole scene. An object remover keeps the photo and removes only selected distractions inside it.
Use a mask that slightly covers the object edge, avoid selecting too much clean background, and make the instruction simple: remove the object and continue the original texture.
The tool is intended for photos you own or have permission to edit. Use it for cleanup, distractions, labels, and defects rather than bypassing rights or attribution.
Try a smaller mask, remove one object at a time, and choose an area where the AI can infer the missing wall, sky, fabric, table, road, or product surface.